Drake Pay: How do I use Drake Pay in Drake Zero or Web1040?
Drake Pay is fully integrated with Drake Zero and Web1040 so that you can accept payments from your clients (taxpayers) quickly and easily. For more information about the application for Drake Pay, see KB 18326. Once you have been approved for Drake Pay, you can start processing payments.
Process Payments
- Verify or enter an amount due for the return preparation.
- If you have configured pricing for returns under Setup > Pricing, this is applied automatically after you calculate the completed return.
- View the return and the Bill to verify the preparation fee. This is also displayed by selecting Quick Calc.
- Make adjustments as needed by using the BILL screen.
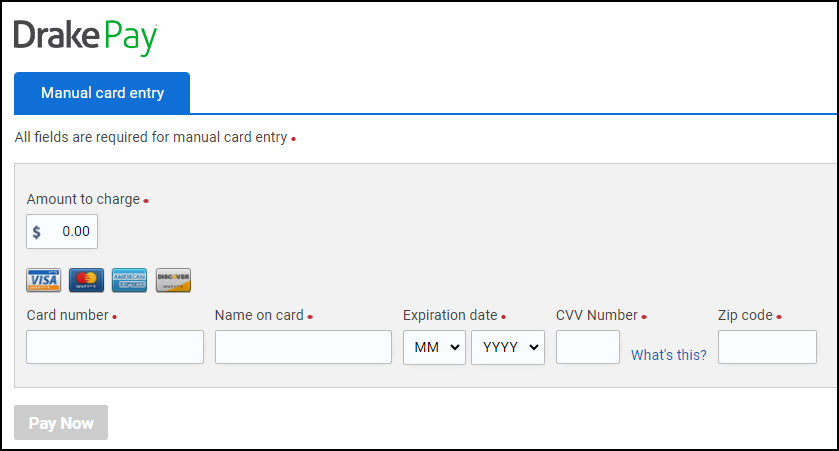
- On the data entry menu, select Tools > Payments.
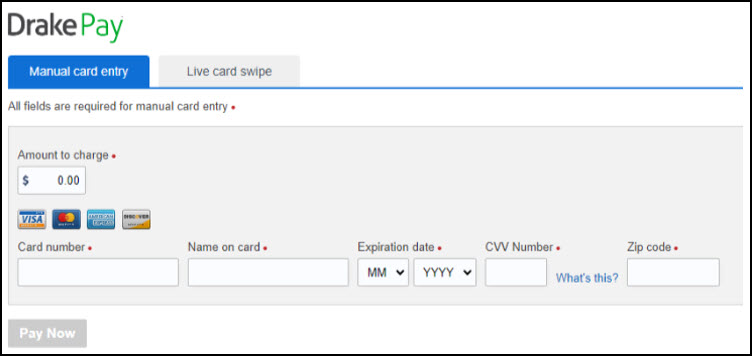
- The Drake Pay information displays. Either manually enter payment details or swipe the credit/debit card using a supported Point of Sale (POS) device.
If you have configured a POS Device, you will see an additional tab labeled Live Card Swipe.
Point of Sale (POS) Device (optional)
The Data Cap DC DirectTM devices are compatible with Drake Pay. For more information about purchasing a compatible device, see KB 18413.
To set up your POS device:
- Go to Setup > Setup Options > POS Devices.
- Click Add POS Device.
- Enter the Device Name.
- Enter the device’s Serial Number.
- Click Save. The device is added to the Device List.
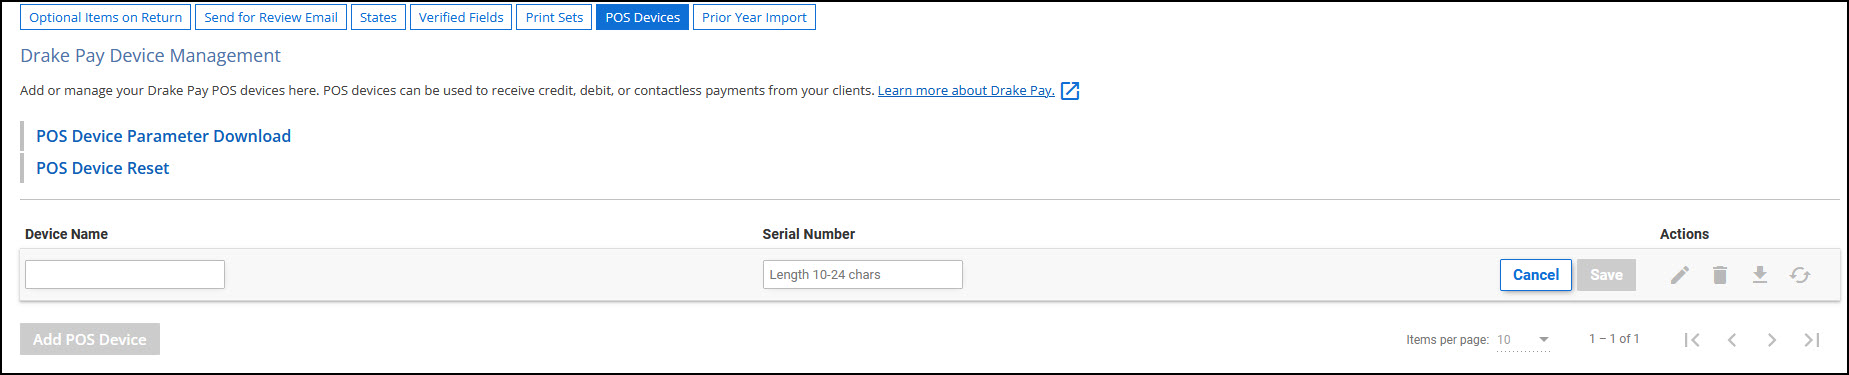
- Exit the window once all devices have been configured.
Notes:
- The option POS Device Parameter Download (download icon under Actions) will update your selected POS device with the latest Drake Pay settings.
- If your POS device is not functioning properly, click POS Device Reset (refresh icon under Actions).
- To make changes to or delete a POS device, select the device from the Device List, and either edit details as needed and Update the device, or Delete the device completely.