Communications Editor
The Communications Editor is designed to generate various types of client results letters, many of them based on data from the tax return and the clients’ filing, payment, or refund preferences. For example, if a return with a federal balance due has been e-filed and the client has opted to mail a check to the IRS, the accompanying client results letter states the balance due amount, provides the e-file information, and gives instructions for mailing the check.
There are also engagement letters, extension letters, letters with amended returns, payment reminders, appointment reminders, pre-season and post-season letters, and cover letters; all of these can be edited and customized in the Communications Editor. All editing is done through the Client Communications Editor. To open the editor, from the Home window, go to Setup > Communications Editor.
See FAQs for additional information.
Open (letter templates)
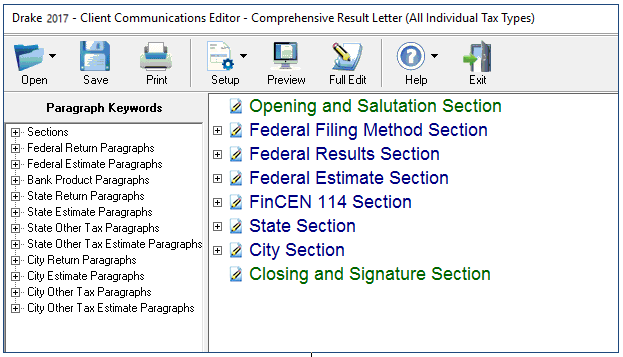
The Open icon provides a list of all available letter template, by return type.
Top of page
- To edit a letter, select the Open toolbar button and select the desired return type Individual, Corporation, S Corporation, Partnership, Fiduciary, Tax Exempt, or Estate Tax. In each package, Result Letter #01 is the default choice. Other result letter templates are available for you to customize. To create your own Result letters, modify the default letter or use one of the available templates.
- Under the Letter Outline view, click the plus sign [+] to expand the Start of Letter category.
- Continue to expand other sub-categories to view all available paragraphs. For example, to edit the Federal Credit Card paragraph, navigate through the tree view and select it under Federal Balance Due. As shown in the screen shot below, double-clicking Federal Credit Card in the tree view, takes you to the corresponding section in the letter template.
- Make the desired changes to the letter template by modifying text in the right-hand pane. Continue to use the Letter Outline tab to quickly navigate the letter template, the Keywords tab to insert keywords, and the format buttons (at the top of the screen) to change font settings.
- Font type and size changes: To change the letter font, select the text and then select the desired font from drop lists in the Font Name and Font Size sections. Fonts currently installed on the machine are available for selection. Text in the edit box changes to reflect the selected font type and size.
Important: If the printer assigned to print letters prints in PCL mode, Courier font size 12 is used regardless of the font selected in Letter Setup.
- Bolding – Select the desired text to bold and click the B button in the text editor options.
- Italicizing – Select the desired text to italicize and click the I button in the text editor options.
- Underlining – Select the desired text to underline and click the U button in the text editor options.
- Left Justify – Select the desired text to left justify and click the button with left aligned lines in the text editor options.
- Center – Select the desired text to center and click the button with centered lines in the text editor options.
- Right Justify – Select the desired text to right justify and click the button with right aligned lines in the text editor options.
- Undo – Click the undo (left curved arrow) button in the text editor options.
- Redo – Click the redo (right curved arrow) button in the text editor options.
- Copy – Select the desired text to copy and click Copy in the text editor options.
- Cut – Select the desired text to cut and click Cut in the text editor options.
- Paste – Place the pointer in the desired location and click Paste in the text editor options.
- Click Save.
Note
Insert Keywords by placing the mouse pointer in the letter where the keyword should be and double-click the keyword in the list. Single-click or hover on a keyword to view a description of that keyword.
Top of page
Select Print from the toolbar options for a printed copy of the letter. The letter prints just as it appears in the letter editor window and includes the keywords, conditions, and begin and end paragraph statements.
Top of page
Selecting Setup from the toolbar menu provides access to the following options:
- Letterhead and Margins: Use this option to set up the letterhead and information that prints at the top of client letters and bills. Click Letterhead for more details.
- Rename Letter (CTRL+N): Use this option to rename letters and describe the letter content better for your business needs.
- Go to Setup > Rename Letter from toolbar options. A pop-up window, showing the current letter description, opens.
- Change the name and click OK.
Note
Once a letter is renamed, selecting the letter as the default in Setup Options and Data Entry, screen 1 can be done by selecting the new letter name.
- Restore Original Letter:
- Open the letter to be restored.
- Go to Setup > Restore Original Letter. The program prompts you for a confirmation. Any changes previously made are permanently overwritten by choosing this option.
- Click Yes to overwrite previous changes and restore the letter to its original state.
- Click Save to save the restored letter.
- Update Prior-Year Letter. Use this option to update a last year letter in place of the current selected letter. Any changes to the current letter is lost during the update process.
- Go to Setup > Update Prior-Year Letter and the "Update Letter" dialog opens.
- You are warned that this option results in lost data during this process; click OK to continue.
- Select the drive for the last year letter location.
- Select Letter to Update from the available drop list.
- Click Continue. The program prompts you for a confirmation.
- Click Yes to complete the update.
- Click Save to save the changes to the letter.
Top of page
Select Preview to see a sample return letter, using the information in the letter editor window.
- Select Preview.
- Select Sample Return from the available drop list.
- Click Continue.
Top of page
Q: Is there a default return letter for each tax package?
A: Yes. Each package has a Result Letter #01 as its assigned default letter.
Q: Does the default letter handle both e-filing and paper-filing scenarios?
A: Yes. The letter program is capable of printing letters that apply to either filing method.
Q: Does the program “know” which type of letter to print?
A: Yes. A return with no message pages is considered eligible for e-filing, so the program generates the e-filing paragraphs automatically. If a return calculation results in message pages, the program generates the paragraphs for paper filing.
Q: I need to print a letter for a client who is e-filing, but the return has message pages. Can I still print a letter for an e-filed return?
A: Yes. If you need to give a return letter to a taxpayer before all message pages are eliminated, you can force the e-filing paragraph to print. Do this from the LTR screen for the selected return.
Q: Why is the default letter so long?
A: The default letter, Result Letter #01, is constructed to handle all supported conditions in the letter program. In other words, it contains text to address most tax-return scenarios on the federal, state, and city levels. Because it can address so many possibilities, the default (or master) letter has multiple pages and paragraphs.
Q: Will the letters to my clients be as long as the default letter?
A: Probably not. While the complexity and number of forms affects the length of a return letter, most taxpayers’ letters are much shorter. All conditional paragraphs are included in the default letter, but not all conditional paragraphs apply to a single client’s return. Use the Preview option to see how the letter looks, and how it differs from the default.
Q: What is a “conditional” paragraph?
A: A conditional paragraph, indicated by the word “Paragraph” at the end of the keyword, appears in a letter only if the named condition is met. For example, if a taxpayer is e-filing a federal return, only the text for “Federal Electronic Filing Paragraph” is displayed; the “Federal Paper Filing Paragraph” text, which does not apply, is omitted from the printed letter.
Q: Why do some keywords end with the word “Paragraph”, and not others?
A: Keywords that end in “Paragraph” indicate conditional text. If a federal return has a balance due, for example, the program automatically selects and prints the “Federal Balance Due Paragraph” text and ignores “Federal Refund Paragraph” and “Federal Zero Due Paragraph” conditionals.
All conditional text must fall between two “Paragraph” markers; the keyword that indicates the condition (such as “Federal Balance Due Paragraph”), and a closing keyword of “End Paragraph”.
Keywords that do not include the word “Paragraph” indicate words, numbers, dates, or other information pulled from the return. For example, in a printed letter, the “Federal Refund” keyword is replaced by the taxpayer’s refund amount on the federal return.
Top of page
Q: Why do some keywords begin with “ST”?
A: Used in some of the longer keywords, “ST” is an abbreviation for “State”.
Q: Why all the colors and angle brackets?
A: Brackets indicate keywords; text within brackets do not show in the printed letter and is replaced by actual data from the return.
The program uses colors to help you determine several things about the text within the default letter.
- Which text shows up, unchanged, in the actual letter
- Which keywords are replaced by dates, words, or numbers, and are not conditional
- Where a conditional paragraph begins, and where it ends
- The level of a conditional paragraph, and whether the conditional paragraph is “nested” within one or more larger, more general conditional paragraphs
All BLACK text is printed, unchanged, in the actual letter.
All RED text indicates non-conditional keywords that are replaced by dates, words, or numbers, or other text pulled from the return. For example, in a printed letter, the “Federal Refund” keyword is replaced by the taxpayer’s refund amount on the federal return.
Top of page
All BLUE, GREEN, PURPLE, TAN, and LIGHT BLUE keywords indicate where conditional paragraphs start and end. A conditional paragraph always begins with a marker that specifies the condition and includes the word “Paragraph” (for example, “Federal Refund Paragraph”). The end of a conditional paragraph is always marked by an “End Paragraph” statement. You can tell where a conditional section begins and ends by observing the colors of the keyword. For example, the section beginning with the GREEN “Federal Refund Paragraph” marker does not end until the program reaches the next GREEN <“End Paragraph”> marker even though other conditional paragraphs may be “nested” between the two markers.
All BLUE keywords indicate the most general level of conditional paragraph, with GREEN, PURPLE, and TAN indicating increasingly smaller levels. LIGHT BLUE keywords are nested with TAN keyword paragraphs, TAN within PURPLE keyword paragraphs, PURPLE within GREEN, and GREEN within BLUE.
Q: Can a conditional paragraph consist of more than one paragraph?
A: Yes. A conditional paragraph can be one sentence long, or can consist of several paragraphs. The term “conditional paragraph” refers to any text that falls within starting and ending conditional markers.
Q: How do I know if state data appears correctly in a letter for multi-state returns?
A: The program takes care of this automatically if the applicable state-return information has been entered.
Q: Can I add my own “personal touch” to a default letter?
A: Yes. For text to appear only one time on the letter, write it before or after, but not within, the markers for conditional paragraphs. For text to appear multiple times (for example, in a multi-state return), or only when a certain condition is met, type the text between the applicable conditional paragraph markers.
Q: I want to use the default letter, but I want to word some of the sentences differently. Can I do that?
A: Yes. You can add, edit, or delete any BLACK text in the default letter. For example, you can change “Sincerely,” at the end of a letter to “Yours Truly,” or you can delete the closing paragraph. Never change text within angle brackets, however; these are keywords and translate to specific data within the program.
Q: I want to use the default letter, but I want to use fewer, more or different keywords. Can I do that?
A: Yes. Available keywords are listed on the KEYWORDS tab of the communications editor. Double-click a keyword to insert it into the open letter. To delete a keyword from the letter, select the entire keyword (including the angle brackets) and press DELETE. Place the pointer over a specific keyword for details; use Preview to see how the printed letter will look.
Top of page
Warning: Do not edit keyword text. Keyword text is any text that is within angle brackets. The program may cease to function properly if keyword text is changed.
Q: What do the state and city “Other Tax” keywords represent?
A: The “Other Tax” keywords apply to state and city taxes that are not income taxes (for example: excise tax, franchise tax, etc.).
Q: Can I create and add new keywords to the program?
A. No. However, if you have an idea for new keywords, we welcome your input. Please email any suggestions to feedback@drakesoftware.com.
Top of page