Drake Accounting®: How do I set up a vendor?
Typically you would identify a vendor as anyone from whom the client makes regular purchases of goods or services, for whom an invoice is needed.
Setting up a Vendor
You can set up new vendors at Payables > Vendor Setup.
- Click New.
- Enter a unique Vendor Code (numbers, letters, or both) of up to 20 characters, preferably something that will help you recognize the vendor.
- Enter data in at least one of these fields: Company Name, First Name, Last Name.
- Choose the appropriate 1099 Options for this vendor:
- If the vendor does not require a 1099, select Do NOT generate a 1099.
- If the vendor requires a 1099, leave Do NOT generate a 1099 unchecked.
- Do not select this option if federal and/or state withholdings are going to be setup
- Complete other fields and tabs, as appropriate.
- All fields identified with
 require entries before the vendor can be saved.
- Review your entries.
- When finished, click Save.
You can edit an existing vendor by double-clicking the vendor, entering or correcting information for the vendor, and clicking Save.
Vendor Withholding
Drake Accounting® now offers the ability to set up separate federal and state withholding under the Payables module for each vendor.
- Go to Payables > Vendor Setup > Withholding tab.
- When you check Calculate Federal or Calculate State, you are required to enter an amount.
- You can choose to apply a Dollar/Cents amount or a Percentage amount to be withheld from a vendor's payment.
For more information about Form 1099 filing requirements, see the IRS FAQ Am I Required to File a Form 1099 or Other Information Return?
Deleting a Vendor
To delete a vendor, go to Payables > Vendor Setup. Select the vendor, then select Terminated in the Status drop-list.
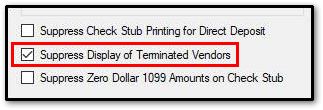
If you also do not want to see those vendors displayed, go to Payables > Options and check the option Suppress display of Terminated Vendors.
On a scale of 1-5, please rate the helpfulness of this article
Optionally provide private feedback to help us improve this article...
Thank you for your feedback!