Can I generate and e-file individual extensions in a batch?
Yes, beginning with Drake Tax 2023, you can generate and e-file extensions for multiple taxpayers at once (in a batch). This process can generate extensions for taxpayers who file Forms 1040, 1040-NR, or 1040-SS, as well as individual state returns for those taxpayers.
Zero Due Extensions
If the taxpayer does not expect to owe any tax, follow these steps to generate and e-file federal and state extensions showing zero ($0) due.
- From the Drake Tax Home window, select EF > Prepare Extensions.
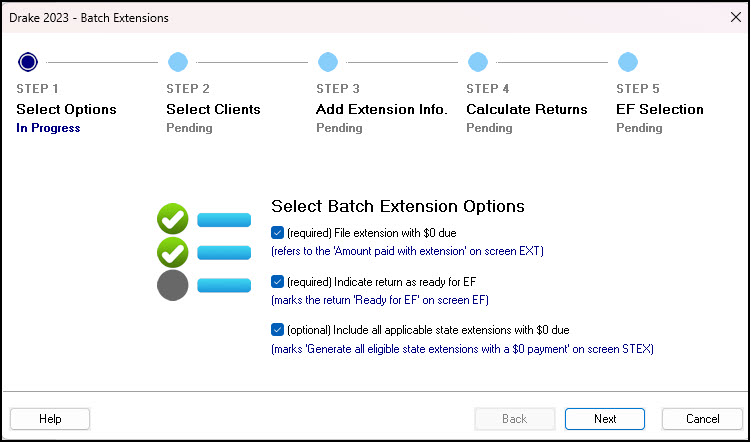
- Select any applicable extension options, then click Next.
- If Require ‘Ready for EF’ indicator on EF screen is marked on Setup > Options > EF tab, the option Indicate return as ready for EF is a required selection. Otherwise, this shows as "(optional)."
- The option Include all applicable state extensions with $0 due will generate state extensions based on
the data entry present in the return at the time of batch creation. Additional states
can be generated on a per-return basis if needed
- Select clients from the list, or click Next to filter all existing clients. The returns are calculated, and the EF Return Selector is displayed.
- Verify the information. If you are ready to continue with e-filing, select all eligible returns, and click Continue.
- NOTE: If changes need to be made, click Exit and make any necessary changes within the return. Recalculate the return and proceed with e-filing when ready.
- From the Drake Tax Home window, go to EF > Transmit/Receive to finish e-filing the selected extensions.
Always verify that the extensions are processed and accepted by the IRS or state agency by reviewing acknowledgments under EF > Process Acks.
Balance Due Extensions
Extensions with a balance due cannot be filed in batches; however, you can use the batch extension feature to automatically complete much of the data entry in a batch. To do so, follow these steps:
- From the Drake Tax Home window, select EF > Prepare Extensions.
- Select all applicable extension options, then click Next.
- If Require ‘Ready for EF’ indicator on EF screen is marked on Setup > Options > EF tab, the option Indicate return as ready for EF is a required selection. Otherwise, this shows as "(optional)."
- Select clients from the list, or click Next to filter all existing clients. The returns are calculated, and the EF Return Selector is displayed.
- Do not make any selections. Click Exit and close the Batch Extensions window.
- Open the return in data entry and change the Amount paid with extension on screen EXT to the expected amount due.
- (optional) Use the STEX screen to adjust the amount due for any states.
- (optional) Complete the PMT screen to arrange for electronic funds withdrawal.
- Calculate the return and verify the details.
- Repeat steps 5 - 8 for each return for which there is a balance due.
- e-File the returns using the EF menu.
On a scale of 1-5, please rate the helpfulness of this article
Optionally provide private feedback to help us improve this article...
Thank you for your feedback!