What is the Drake Tax 1040 package? How do I purchase and redeem a return as a Drake Tax 1040 program user?
If you prepare a large number of 1040 returns, but a small number of business/estate returns, the Drake Tax 1040 package might be right for you. Details regarding pricing can be found on the support website pricing page. State programs and e-filing* are available at no additional charge with all versions of Drake Tax.
A Drake Tax 1040 user can purchase:
- Business/Entity Returns (1120, 1120-S, 1120-H, 1065, 1041, 990, 706 Returns) - 0 included, purchase as needed
- Drake Accounting - choose from:
- Professional Edition (accounting and payroll)
- Forms Edition (forms only, included in the Professional Edition)
- TheTaxBook WebLibrary Plus Research Tool
- Drake Portals
- GruntWorx Dollars
Jump to a Section to Learn More:
Internet Required
Internet access is
required for the use and activation of the Drake Tax 1040 version and
the purchase of additional business/estate returns. As with the Pro package, internet
access is also required to keep the software updated.
Drake Tax 1040 Installation
- Drake Tax can be installed on peer-to-peer networks.
- On networks not using a true
server (networks where one computer is designated a “server” and the other computers
share files through that computer), returns can be redeemed on any of the
computers in the network. Do not, however, transmit from more than one computer.
- Drake Tax can be installed on a server.
- On networks using a true server, all returns are
redeemed from the server, and all computers on the network have access to all the
returns through the server.
- Redeemed returns can be moved to other computers.
- A redeemed return can be
copied and moved to another computer without counting against your
total. Both computers must have the same ERO setup in order to allow for
this movement.
- The SSN/EIN field is grayed out on all return types in the Drake Tax 1040 Package. See below for more information about changing file types and changing the ID number on a return.
Summary
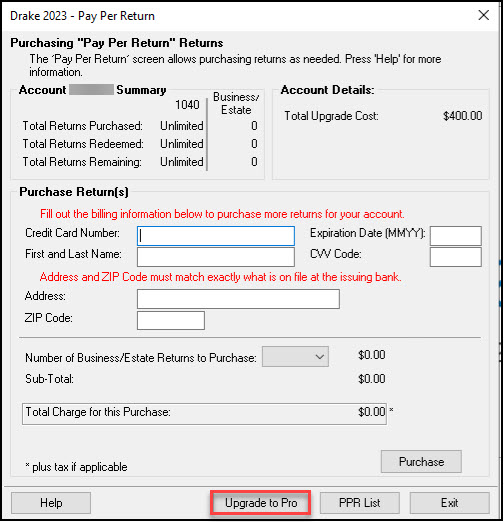
Open Drake Software and go to the Setup > Pay Per Return screen:
- Account Summary - broken down in the following categories, cross-referenced with whether the return is an Individual (1040, 1040-NR, 1040-SS Returns) or a Business/Estate (1120, 1120-S, 1120-H, 1065, 1041, 990, 706 Returns).
- Total Returns Purchased
- Shows how many returns have been purchased. The Drake Tax 1040 package comes with:
- An Unlimited number of Individual returns
- Zero (0) Business/Estate returns.
- Total Returns Redeemed
- A return is “redeemed” when you:
- Start a new return,
- Update an existing return*
- Change the EIN on a return,
- Note: A return redeemed on this machine can be moved to another machine.
- Total Returns Remaining
- The total returns remaining are the amount of returns that have been purchased, but have not been redeemed.
- Account Details - This section shows how much it will cost to upgrade your 1040 package to Pro.
- Purchase Returns - This section allows you to purchase additional returns (see below for details).
- PPR List - Verify which ID numbers were used to activate returns.
Purchasing Returns
To successfully complete a PPR purchase, you must have:
- an active Drake account
- the correct account information entered on the ERO screen
- an internet connection
To purchase:
- Go to Setup > Pay Per Return.
- Enter valid credit card and billing information.
- Select the number of Business/Estate Returns to purchase.
- Verify the transaction details and click Purchase.
- Respond to the prompts to confirm the purchased. A successful purchase confirmation is returned within a few seconds after the purchase has been completed.

Notes:
- If the EFIN information on the ERO screen is missing or did not pass the validation process, you are prompted to correct it.
- If the credit card purchase cannot be completed for any reason, the error message for the invalid field is given. For example: "missing name or address field," or an invalid expiration date message if the credit card has expired.
- If the credit card number is incomplete or does not meet the standards for the accepted credit cards, an error message is displayed.
- Once returns are paid for, they can be used or "redeemed" simply creating and redeeming a new return or updating a return from the previous year.
- Returns can be redeemed only one at a time.
- Returns cannot be purchased or redeemed by phone. If your internet connection is offline, you can still work in redeemed returns, but you cannot purchase or redeem more returns until the internet connection is reestablished.
PPR Bank (Business/Estate)
When you have available returns during the Open/Create process, you will see the notification that the redemption will decrease the available number of returns in the bank and show how many will remain after that return is redeemed.
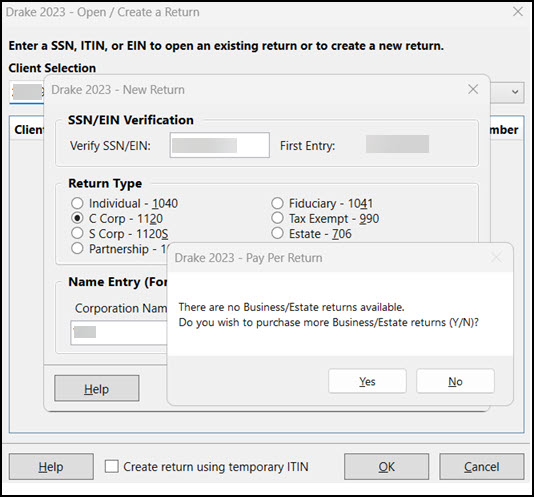
It is important to note that zero (0) business/estate returns are included with your initial purchase. You must purchase a business/estate return before you will be able to redeem and create any business or estate returns. If you attempt to redeem a return when there are no available (un-redeemed) returns for that type, you will see the message "There are no Business/Estate returns available. Do you wish to purchase more Business/Estate returns (Y/N)?"
Updating Returns and Redeeming vs. Read Only
It is recommended that you update returns as you begin to work on them. If you choose to update a return, it will not be redeemed until you choose to open it in data entry. The following pop-up will ask if you want to redeem the return or continue in read-only mode.
There are several ways to use PPRs so that they are counted against your total of purchased and redeemed returns:
- Starting a new return
- Updating an existing return
- Changing the EIN of a return
- Changing the file type
Starting a new return:
- From the Home window toolbar, click Open/Create.
- Enter an SSN or EIN in the Open/Create a New Return dialog box. Click OK.
- In the Open Return window, click Yes.
- Verify the SSN/EIN
- Note: this is required for all returns, even though 1040 returns are unlimited in this version.
- Select a Return Type.
- Enter a name in the Name Entry text box. Click OK.
- Click Yes to verify that you want this return counted against your total.
Updating a return:
- From the Home window, go to Last Year Data > Update Clients 20XX to 20YY.
- In the Update Client Selection dialog box, enter an SSN/EIN and click Add Client.
- Click Next.
- In the Update Options menu, select the items to update.
- Click the Update [return type] button. (If you are updating business* returns, the button will be labeled with the appropriate return type - 1120, 1120-S, 1065, etc.)
- You are offered the opportunity to count the newly updated return against your supply of purchased but un-redeemed returns, or to open the return in read-only mode. You cannot make any new entries or calculate the return while in read-only mode.
Another method of updating a return is to click Open/Create from the toolbar, enter the SSN or EIN of a previous year’s client, and then make selections from the Update Options menu. You are then given the option to redeem the return, open in read only, or cancel.
Some states are
requiring certain fields to be verified upon update. If the SSN or EIN field is
highlighted in green, as a PPR user you will be unable to click
directly in that field (it will be grayed out). After verifying that the entries on screen 1 are correct, right-click and choose Clear Flags on this Screen.
Changing the EIN of a return:
Individual
Since you have an unlimited number of 1040 returns in this package, you are not charged to change the SSN on a return. To change the SSN:
- From the Home window, go to Tools > File Maintenance > Change ID Number on Return.
- In the Incorrect ID number text box, enter the current SSN.
- In the Correct ID number text box, enter the new SSN to associate with this return.
- Click Continue, and then click Exit.
- After changing a return’s SSN, update your client list by running the Repair Index Files tool. From the Home window, go to Tools > Repair Index Files.
Business/Estate
When the EIN is displayed on screen 1 of data entry, the return is counted against your supply of returns. You can change the EIN associated with a return, but this will cost you another business/estate PPR*. To change it:
- From the Home window, go to Tools > File Maintenance > Change ID Number on Return. An alert reminds you that changing the ID counts against your total number of PPRs. Click Yes.
- In the Incorrect ID Number text box, enter the current EIN.
- In the Correct ID Number text box, enter the new EIN to associate with this return.
- Click Continue, and then click Exit.
- After changing a return’s EIN, update your client list by running the Repair Index Files tool. From the Home window, go to Tools > Repair Index Files.
Changing File Type:
You cannot change an individual return into a business/estate return or vice versa. You can change the file type of a business/estate return to a different type of business/estate return, but this will cost you
another business/estate PPR*.
To change the file type:
- From the Home window, go to Tools > File Maintenance > Change
File Type to open the Convert Client Data File Type dialog box. An
alert reminds you that changing the ID counts against your total of PPRs.
- Click Yes.
- Enter the EIN of the return you wish to change.
- Click Continue.
- From the Convert this file to: section, select the type of return you wish
this return to be converted to.
- Click Continue, and then click OK.
*You must have another business return PPR available in your bank to proceed.
Upgrading to Pro
You can upgrade your Drake Tax 1040 package to Drake Tax Pro at any time by going to Setup > Pay Per Return and choosing the option Upgrade to Pro.
You can contact our Software Accounting department at (828) 349-5900 for more information or assistance.
The following pop-up displays when you have completed the upgrade:
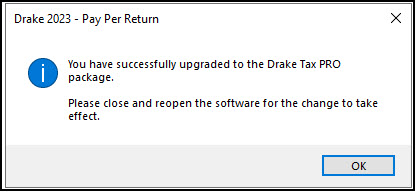
IMPORTANT! You must close out of Drake Tax and relaunch it for the upgrade to take effect.
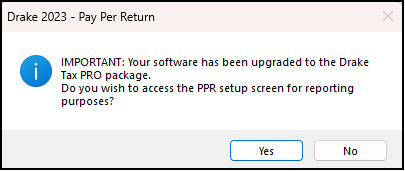
If you have upgraded your purchase to Drake Tax Pro from Drake Tax 1040, you will see this message when you go to Setup > Pay Per Return. You can click Yes to access the setup screen for reporting purposes:
If you are prompted to purchase additional returns after upgrading to Drake Tax Pro, take the following steps (even if you completed this setup previously):
- Log in to the Support site and go to Downloads > Drake Tax.
- Locate the e-file Password line and click Copy.
- In Drake Tax, go to Setup > Electronic Filing and Account Information (ERO) and paste the password in the e-file Password field.
- This password is case-sensitive so you should use copy/paste to prevent typos.
- Click OK.
- Go to Setup > Firms.
- Select Firm 1 and click Edit Firm (or double-click to edit).
- Beside your EFIN, click Confirm.
- Then click Save.
On a scale of 1-5, please rate the helpfulness of this article
Optionally provide private feedback to help us improve this article...
Thank you for your feedback!